
How to Install a 15.75″ PLUSLED S-Shape Outdoor Wall Sconce on Your Front Door This July 4th Weekend: A Step-by-Step Summer 2026 DIY Guide
There is a very particular feeling that comes with pulling up to your own American home on a warm July evening, seeing your front door glow beneath a fixture you installed, and thinking: I did that. Summer 2026 is prime time for that kind of quick-win curb appeal project. Between backyard BBQs, the Independence Day cookout, and the endless string of weekend guests that show up between Memorial Day and Labor Day, the front-door area of your home is basically on stage all summer long. And nothing upgrades that stage faster than swapping a tired builder-grade porch light for a modern, statement-scale wall sconce.
This walkthrough shows you exactly how to install the PLUSLED Large 15.75″ Modern Outdoor Wall Sconce — a 20W hardwired matte black S-shape LED porch light with IP65 up-down lighting — in a single Saturday afternoon before your July 4th cookout kicks off. No electrician callout, no rewiring nightmare, no waiting on a $250 service window. Just you, a ladder, a screwdriver, and about ninety honest minutes of work.
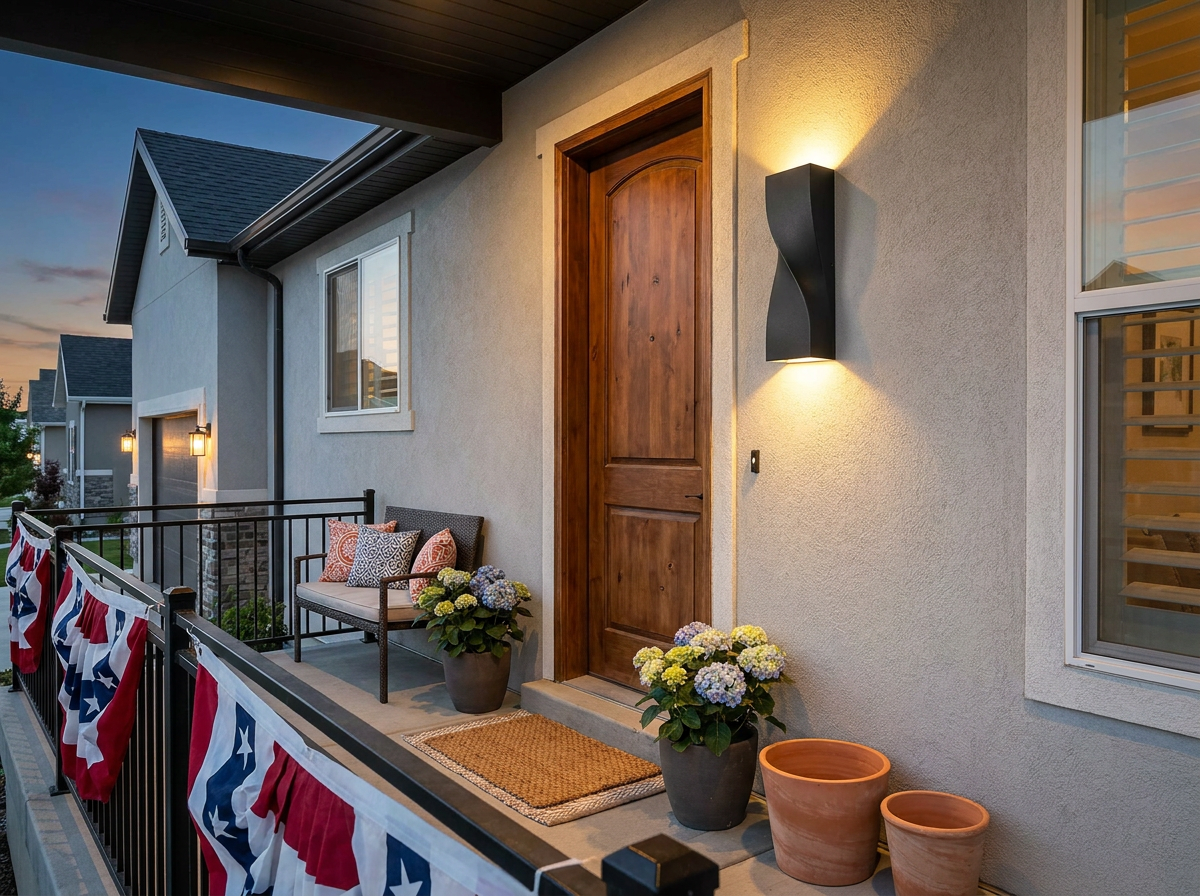
Why This Sconce, and Why This Weekend
Most builder-grade porch lights are 8 to 10 inches tall. On a modern American home with tall front doors, garage bays, or vaulted entryways, they look like an afterthought. The 15.75-inch vertical S-shape sconce reads architectural — the kind of fixture you see on Zillow listings that quietly add five figures to a home’s perceived value. According to Better Homes & Gardens and Lamps Plus install guides, oversized exterior sconces are one of the top-searched curb-appeal upgrades of summer 2026, and the timing lines up perfectly with the Independence Day home-hosting season.
Practical reasons the PLUSLED 15.75″ wall sconce is a great July 4th weekend project:
- Hardwired 20W LED, not solar — reliable brightness even on cloudy pre-BBQ Fridays.
- IP65 waterproof, so surprise summer thunderstorms are a non-issue.
- Up-and-down light output hits both the door casing and the walkway, doubling as ambient and security lighting for guests arriving after dark.
- Matte black S-shape profile plays nicely with any siding color — white board-and-batten, gray fiber cement, red brick, or warm cedar.
- Uses your existing outdoor wall junction box, so no new wire runs required for a straight replacement.
Tools & Materials You’ll Need
Before you climb the ladder, lay everything out on the porch. Fifteen minutes of prep saves an hour of “where did I put the screwdriver” mid-install.
- PLUSLED 15.75″ S-Shape Outdoor Wall Sconce (mounting hardware and gasket included)
- Non-contact voltage tester (the single most important tool of the day — do not skip)
- Phillips-head screwdriver + flat-head screwdriver
- Wire nuts (usually included, but keep spares in size yellow / red)
- Electrical tape
- 6-foot step ladder
- Silicone caulk (clear, exterior-grade) for sealing the mounting plate
- Optional: cordless drill + 1/8″ bit if your siding needs pilot holes
Step 1: Kill the Power at the Breaker
Head to your breaker panel and flip the circuit that feeds the exterior porch light. If your breakers aren’t labeled (welcome to the club), flip individual breakers off one at a time and check the existing porch light — the switch inside should be in the ON position so you can confirm the moment the light dies. Once it’s dark, tape a sticky note over the breaker that reads “DO NOT TURN ON — INSTALLING FIXTURE.” Trust me. A well-meaning family member will absolutely try to flip it back on to grab something from the fridge.
Step 2: Verify Power Is Off (Non-Negotiable)
Remove the old fixture’s two mounting screws, gently pull the fixture away from the wall to expose the wires, and touch your non-contact voltage tester to every wire — black, white, and ground. If the tester lights up or beeps, stop, put everything down, and figure out which breaker you actually killed. If it stays silent on all three, you’re clear to keep going. Every year the ER sees preventable shocks from this exact step — don’t be a statistic during your July 4th weekend.
Step 3: Disconnect the Old Fixture
Unscrew the wire nuts and separate the old fixture’s leads (black-to-black, white-to-white, ground to the green or bare copper wire attached to the mounting bracket). Set the old fixture aside — it’s coming down with you off the ladder in one piece. Take a phone photo of the exposed junction box before you disconnect anything. It’s a five-second insurance policy for step 5.
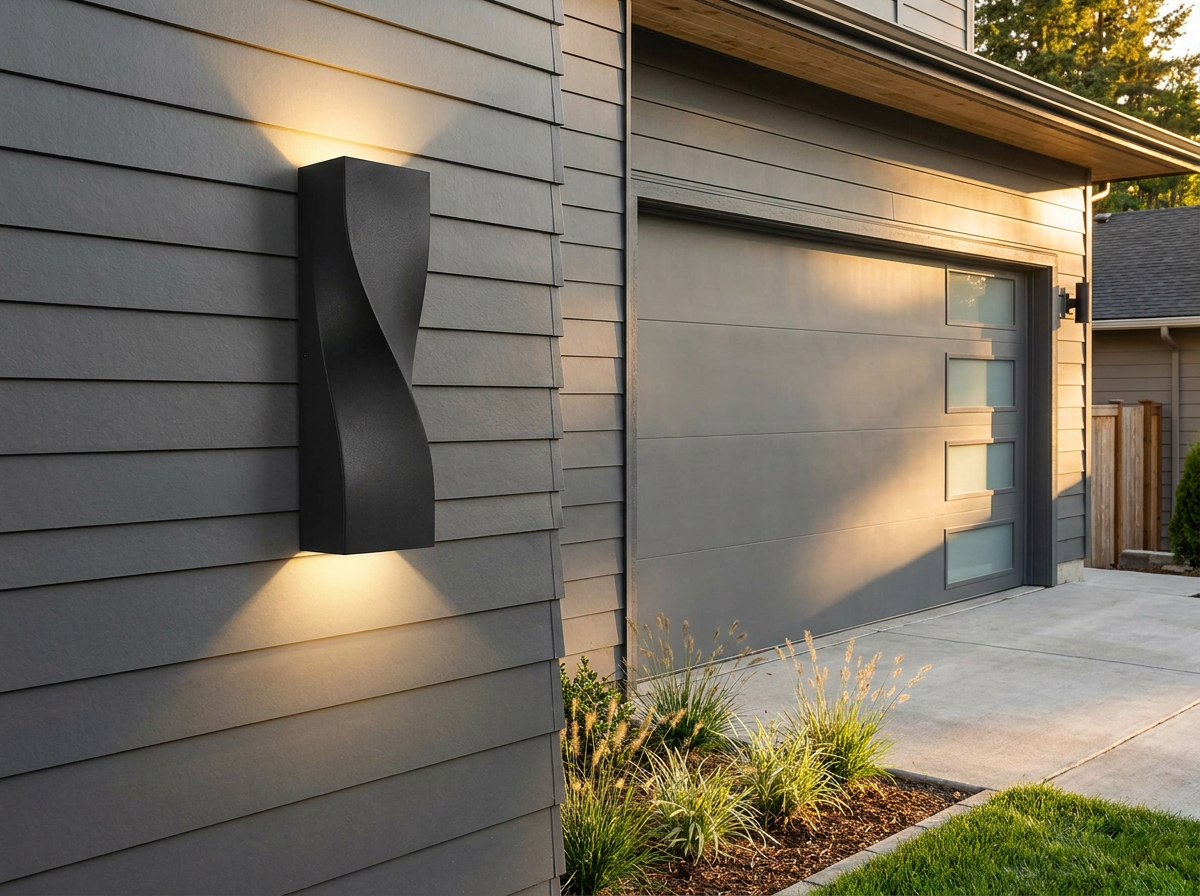
Step 4: Attach the New Mounting Plate
The PLUSLED 15.75″ wall sconce ships with a universal steel mounting bracket that fits standard US octagonal and round junction boxes. Line the bracket’s center hole over the box’s threaded stud (or the two screw holes on either side, depending on your box). Thread the ground wire from your junction box through the bracket’s green ground screw and tighten. Then bolt the bracket to the junction box using the two long machine screws included in the hardware bag. Snug, but don’t over-tighten — you can strip the threads on aluminum boxes.
Step 5: Connect the Wires (The 90-Second Part Everyone Overthinks)
You’ll be joining three pairs. It really is this simple:
- Black to black (hot / line). Twist the two wires clockwise, cap with a yellow wire nut, tug to confirm.
- White to white (neutral). Same technique.
- Green (or bare copper) to green (ground). If your fixture came with a ground pigtail, connect it to the incoming ground plus the bracket ground.
Wrap each wire nut with a single turn of electrical tape as insurance. Then gently fold the wires back into the junction box in an accordion shape so they nest without pinching.
Step 6: Mount the Sconce Body & Seal the Gasket
Slide the S-shape fixture body over the two decorative cap nuts on the mounting bracket. Because this is a 15.75-inch fixture, have a helper support the bottom while you thread the cap nuts on — you don’t want to hang the full weight off two wires. Snug the cap nuts by hand, then a gentle quarter turn with a screwdriver. Finally, run a thin bead of clear exterior-grade silicone caulk along the TOP edge of the mounting plate (never the bottom — you want any trapped moisture to weep out). This is what earns your fixture the full IP65 rating in the real world.
Step 7: Restore Power & Test the Up-Down Glow
Head back to the breaker, peel off your sticky note, and flip the circuit ON. Come back to the porch, hit the interior wall switch, and enjoy the moment. You should see a clean warm 3000K glow washing upward toward the eaves and downward toward the doormat. The whole entryway will feel visibly taller and more architectural — a $55 fixture doing $500 worth of visual work.
Pro Tips for the July 4th Cookout Debut
- Install Friday evening so you can enjoy the fixture Saturday morning and adjust the aim (if applicable) before Sunday’s BBQ crowd shows up.
- Pair the sconce with a dusk-to-dawn smart bulb switch (if your interior switch stays permanently on) so the fixture auto-runs from sunset through 4th of July fireworks.
- If you’re installing on both sides of a double-garage door, buy the wall sconce in a pair — symmetry is what makes the upgrade look intentional instead of accidental.
- Snap a “before and after” photo. This fixture consistently generates the biggest curb-appeal reaction on neighborhood Facebook groups all summer.
When to Call in a Pro Instead
DIY installs are safe and legal in every US state when you’re doing a straight one-for-one fixture replacement on an existing junction box. Call a licensed electrician if: (a) there is no existing box at your desired mounting location, (b) the incoming wires are aluminum instead of copper, (c) your home was built before 1965 and still has knob-and-tube wiring, or (d) the breaker panel is a recalled Federal Pacific or Zinsco. None of that changes the fixture itself — the PLUSLED S-shape sconce is still the exact same fixture your electrician would install.
Shop the Fixture & Own Your July 4th Curb Appeal
By this time next weekend, your front door can be the one glowing on the block. The PLUSLED 15.75″ Modern Outdoor Wall Sconce is the fastest, most cost-effective summer 2026 curb-appeal project on our entire catalog — one Saturday afternoon, one ladder, one $55 fixture, and years of American front-door presence to show for it. Grab yours before the July 4th weekend rush and get it installed in time for the neighbors to notice.
Shop This Product
PLUSLED — modern outdoor LED lighting engineered for American homes. Free US shipping on every wall sconce.