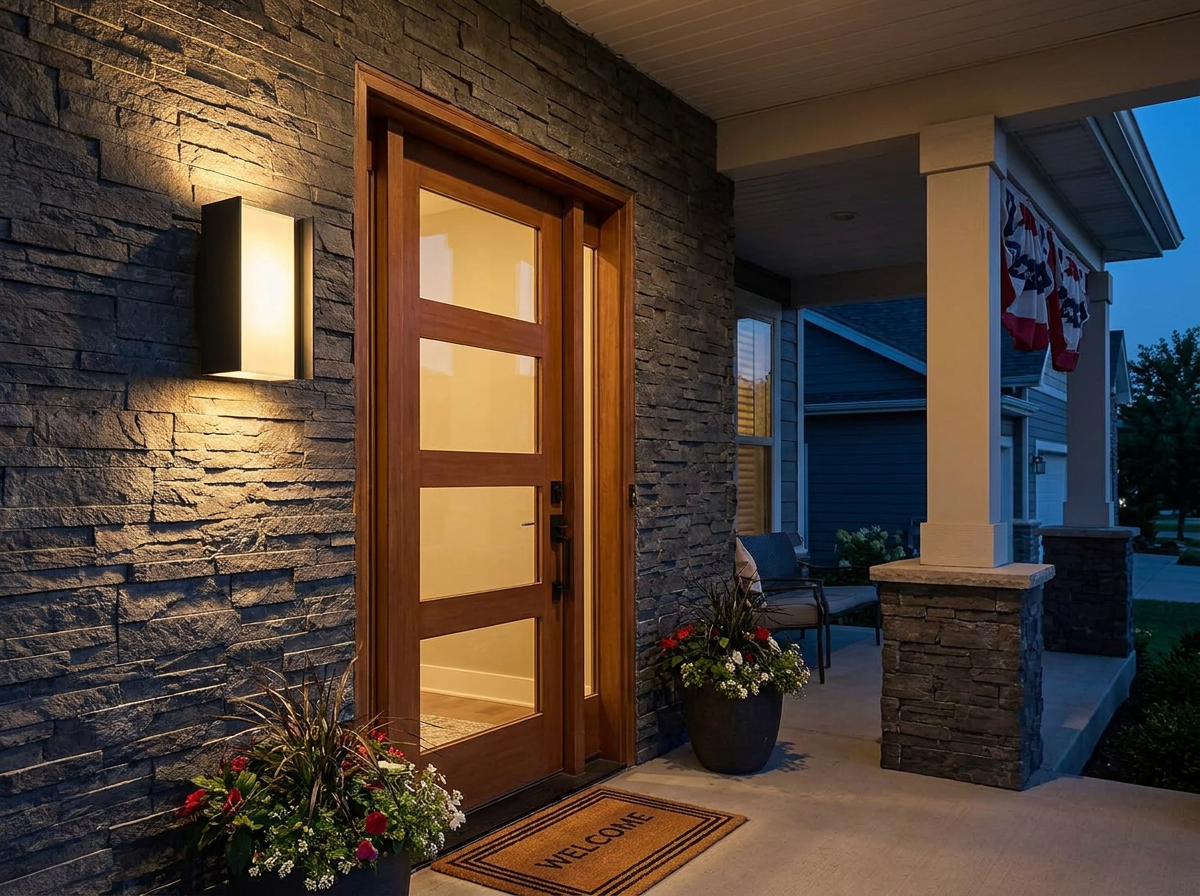
With Independence Day weekend just around the corner, American homeowners are doing a final round of front-door upgrades before the cookouts, the family photos, and the inevitable neighborhood block party. And the single most-requested project on home improvement forums this week? Swapping out a tired old porch lantern for a modern up-down LED wall sconce. The look is everywhere on Zillow listings in Austin, Charlotte, and Phoenix in summer 2026 — two clean beams of warm 3000K light tracing up the siding and pooling down onto the doormat. It is, hands-down, the cheapest curb appeal upgrade an American homeowner can finish before the fireworks start.
The good news: this is a true Saturday-morning DIY. If your house already has an exterior junction box where the existing fixture sits (almost every American front door, garage, and back patio does), the swap takes about 90 minutes start to finish. In this guide I’ll walk you through the exact pre-July 4th install of the PLUSLED Modern LED Outdoor Wall Sconce 20W Up-Down Exterior Lighting Fixture in matte black aluminum — the rectangular waterproof porch light that’s been quietly outselling traditional lanterns on PLUSLED this summer.
Why This Specific Sconce Is the Pre-July 4th 2026 Winner
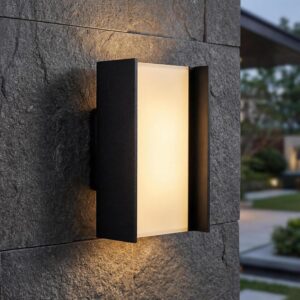
Before we pick up a single screwdriver, it’s worth understanding why the up-down profile matters for an American summer evening. A traditional lantern throws light in 360 degrees — beautiful, but messy. A modern up-down sconce sends two crisp, parallel beams: one washes up the siding and disappears into the soffit, the other lands on the porch floor where you actually need to see your keys. The result is restaurant-patio level lighting with zero light pollution leaking into your neighbor’s bedroom window — important when half the block has a 2-year-old trying to nap before the fireworks.
The PLUSLED 20W version pairs that beam pattern with a few practical wins for July weather: an IP65 waterproof rating that handles a Florida thunderstorm or a Texas July humidity dump, a die-cast matte black aluminum housing that won’t rust out by Labor Day, and a 3000K warm white color temperature that flatters skin tones in the family group photo. Twenty watts of LED is roughly 150 watts of incandescent equivalent — bright enough for a two-car driveway, soft enough for a romantic backyard dinner.
Tools and Materials Checklist (Run This Before Saturday Morning)
- The PLUSLED Modern 20W Up-Down LED Outdoor Wall Sconce (one per door — most American homes do two for symmetry on the garage, one on the front)
- A non-contact voltage tester (the yellow pen-style one from Home Depot, $15)
- A Phillips #2 screwdriver and a flathead
- Wire nuts, sized for #14 AWG (orange ones)
- Outdoor-rated silicone sealant — clear, not white
- A small step stool or 4-foot ladder
- A flashlight or your phone light (you’ll be working with the breaker off)
- A pencil and a small spirit level
One thing the install instructions don’t tell you: keep a roll of painter’s tape handy. You’ll use it to mark the breaker that controls the porch light so nobody flips it back on while you’re elbow-deep in the wires. Trust me — your spouse running outside with a fresh tray of burgers does not check breakers.
Step 1: Kill the Power and Verify (5 Minutes, Non-Negotiable)
Walk to your main electrical panel. Find the breaker labeled “porch,” “exterior,” “front lights,” or — if you live in a house built before 2005 — most likely just “lights.” Flip it off. Tape over the switch handle inside the house in the on position so nobody touches it. Now go back outside, flip the porch light switch on, and confirm the existing fixture is dead. Touch the non-contact voltage tester to the black wire inside the old fixture. If it doesn’t beep, you’re safe to proceed. If it does beep, you killed the wrong breaker — go find the right one.
Step 2: Remove the Old Fixture (10 Minutes)
Most older American porch lights are held on by two acorn nuts on a center mounting bar, or two screws on the sides. Loosen them, lower the fixture, and you’ll see three wires: black (hot), white (neutral), and either bare copper or green (ground). Unscrew the wire nuts, untwist the wires, and set the old fixture aside for the recycle bin. Take a look at the junction box now — if there’s old caulk, gunk, or a bee nest in there (it happens every June), clean it out with a damp paper towel.
Step 3: Mount the New PLUSLED Bracket (15 Minutes)
Open the PLUSLED box. You’ll find the mounting bracket pre-drilled to fit any standard US junction box (3.5-inch round or 4-inch octagon). Thread the supplied long screws through the bracket into the existing junction box ears. Use the spirit level to make sure the bracket is dead horizontal — this is the step that separates a pro-looking job from a crooked one. Pencil-mark the wall through the bracket if you need extra anchor points; otherwise, tighten the two main screws.
Step 4: Wire It Up (10 Minutes)
The PLUSLED sconce comes with three pre-stripped pigtails: black, white, and green. Match them up with your house wiring — black to black, white to white, green or bare copper to green. Twist each pair clockwise, cap with a wire nut, and give a gentle tug to make sure nothing slides out. Tuck the wires neatly back into the junction box. American electrical code (NEC 314.16) wants at least 6 inches of free wire for future service — you should have plenty.
Step 5: Seat the Fixture and Seal the Edges (10 Minutes)
Slide the fixture body onto the bracket and tighten the two finish screws on the sides. Now take your clear silicone and run a thin bead along the top and side edges where the fixture meets the wall — leave the bottom edge open so any condensation can drain. This is the pre-July 4th detail most DIYers skip, and it’s the single biggest reason wall sconces fail by their second summer. A ten-cent bead of silicone gives you a decade of dry electronics.
Step 6: Restore Power and Admire
Pull the painter’s tape off, flip the breaker back on, and hit the porch light switch. You should see two clean parallel beams of warm 3000K light — one washing up the siding, one pooling on your welcome mat. If the LED looks too cool or too warm, double-check your switch isn’t an old incandescent dimmer (it can cause flicker on non-dimmable LEDs). Step back to the sidewalk and look at your house from the angle a cookout guest will see it on July 4th. The transformation is, frankly, unfair for the price.
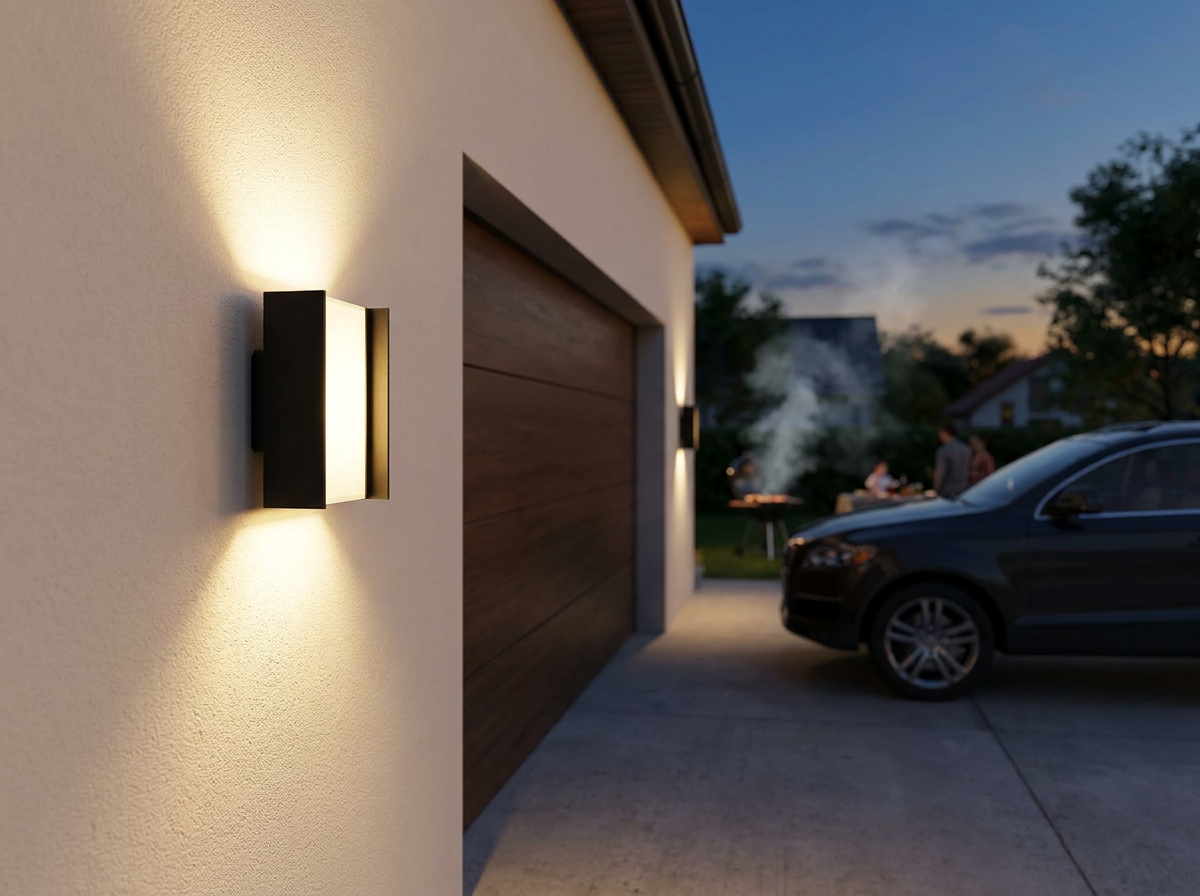
Pre-July 4th Pro Tip: Do Both Sides of the Garage Too
If you have time on Saturday afternoon, do the matching pair on either side of the garage door. The symmetry effect — three identical up-down sconces lined up across the front of an American home — is the single thing that pushes a property from “lived-in” to “for-sale-listing-ready” in summer 2026. Real estate agents in Atlanta and Dallas have been quietly recommending it on every pre-listing walkthrough this June.
Final Thought Before the Fireworks
Your American front door is going to be photographed more times this Independence Day weekend than at any other moment of the year — by family arriving for the cookout, by the neighborhood kids in costumes, by your aunt’s iPhone for the family group chat. A 90-minute install of a modern up-down LED wall sconce is the single highest-leverage upgrade you can make before that first guest rings the doorbell. Shop the PLUSLED 20W Modern Up-Down Outdoor Wall Sconce today and have your front door looking July-4th-ready by Sunday dinner.